

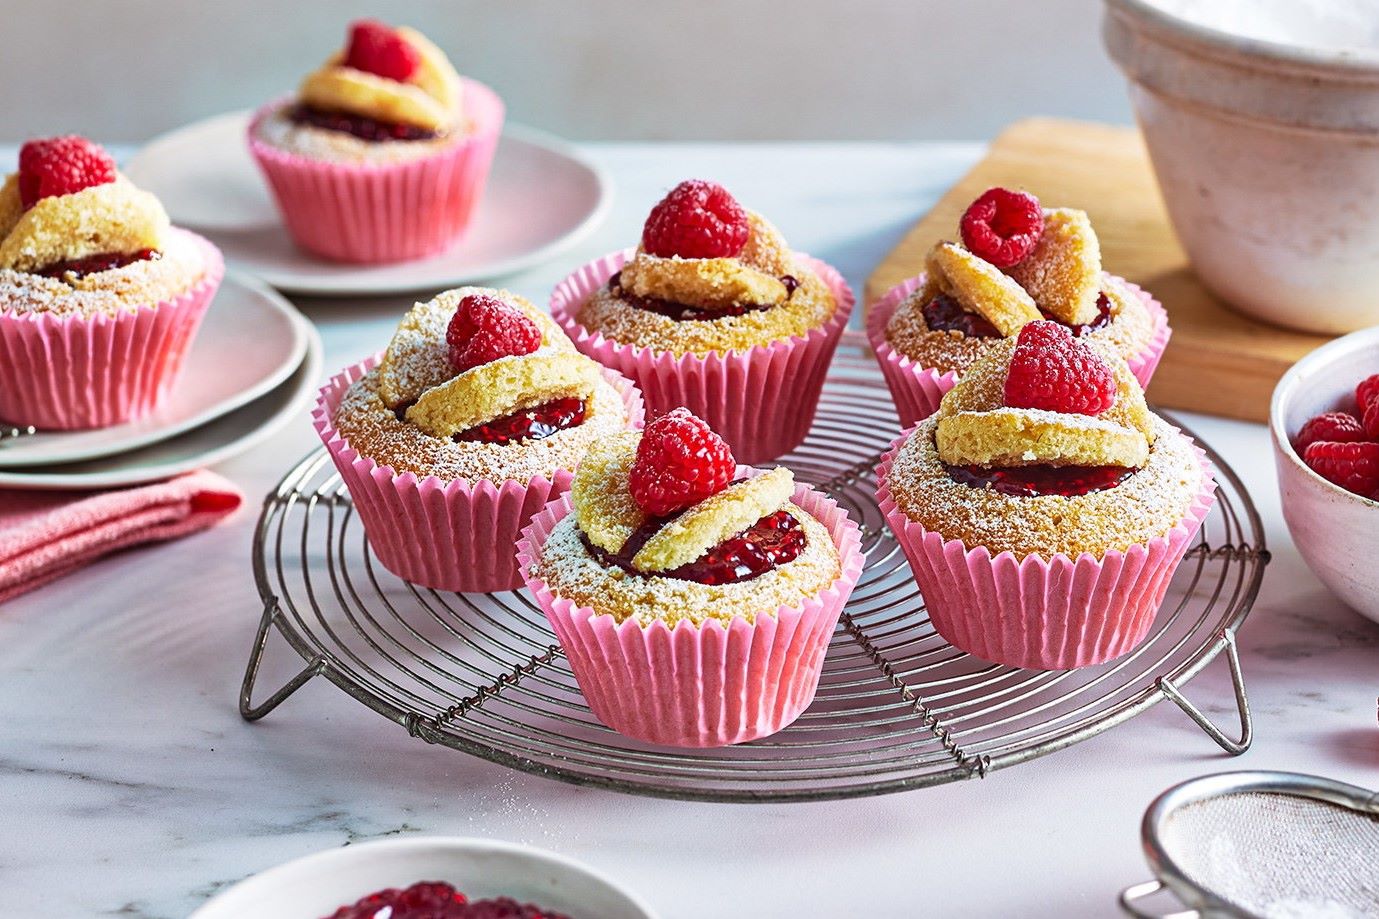
Fairy cakes are delightful little treats that are perfect for any occasion. These light and fluffy mini cakes are easy to make and can be decorated in countless ways to suit your taste and style. Whether you're baking for a party, a special event, or just because, these fairy cakes are sure to bring a touch of magic to your table.
Most of the ingredients for fairy cakes are common pantry staples. However, you might need to ensure you have self-raising flour on hand, as it is essential for the cakes to rise properly. If you don't have caster sugar, you can substitute it with granulated sugar, though the texture might be slightly different. Vanilla extract is also crucial for adding that lovely flavor, so make sure to pick up a bottle if you don't already have it.
Ingredients for Fairy Cakes Recipe
Butter: Softened butter is essential for creating a creamy and smooth batter. It adds richness and moisture to the cakes.
Caster sugar: This fine sugar dissolves easily and helps to create a light and airy texture in the cakes.
Eggs: Eggs provide structure and stability to the batter, helping the cakes to rise and hold their shape.
Self-raising flour: This flour contains a leavening agent that helps the cakes to rise, resulting in a light and fluffy texture.
Vanilla extract: Adds a lovely, sweet flavor to the cakes, enhancing their overall taste.
Milk: Helps to create a smooth batter and adds moisture to the cakes, ensuring they are soft and tender.
Technique Tip for Perfect Fairy Cakes
When creaming the butter and sugar, make sure the butter is at room temperature. This ensures it blends smoothly with the sugar, creating a light and fluffy mixture. If the butter is too cold, it won't incorporate well, and if it's too warm, it can become greasy. Use an electric mixer for the best results, and beat the mixture for about 3-5 minutes until it turns pale and fluffy. This step is crucial for achieving the perfect texture in your fairy cakes.
Suggested Side Dishes
Alternative Ingredients
softened butter - Substitute with margarine: Margarine can be used as it has a similar fat content and will provide a similar texture and moisture to the cakes.
softened butter - Substitute with coconut oil: Coconut oil can be used for a dairy-free option and will add a slight coconut flavor.
caster sugar - Substitute with granulated sugar: Granulated sugar can be used, though it may result in a slightly coarser texture.
caster sugar - Substitute with honey: Honey can be used for a natural sweetener, but reduce the amount slightly as honey is sweeter than sugar.
large eggs - Substitute with flax eggs: Flax eggs (1 tablespoon ground flaxseed mixed with 3 tablespoon water per egg) can be used for a vegan alternative.
large eggs - Substitute with applesauce: Applesauce can be used to add moisture and act as a binder, suitable for a lower-fat option.
self-raising flour - Substitute with plain flour and baking powder: Use 125 g plain flour and 1.5 teaspoon baking powder to replicate self-raising flour.
self-raising flour - Substitute with gluten-free self-raising flour: For a gluten-free option, use a gluten-free self-raising flour blend.
vanilla extract - Substitute with almond extract: Almond extract can be used for a different but complementary flavor.
vanilla extract - Substitute with maple syrup: Maple syrup can add a unique sweetness and flavor.
milk - Substitute with almond milk: Almond milk can be used for a dairy-free option.
milk - Substitute with yogurt: Yogurt can add extra moisture and a slight tang to the cakes.
Other Alternative Recipes Similar to This
How to Store or Freeze Your Fairy Cakes
- Once your fairy cakes have cooled completely, place them in an airtight container. This helps maintain their moisture and keeps them fresh for up to 3 days at room temperature.
- For longer storage, wrap each fairy cake individually in plastic wrap or aluminum foil. This prevents them from drying out and helps retain their delightful fluffiness.
- If you plan to freeze your fairy cakes, first ensure they are completely cooled. Place them on a baking sheet and freeze for about an hour. This initial freezing step prevents them from sticking together.
- After the initial freeze, transfer the fairy cakes to a freezer-safe bag or container. Label with the date to keep track of their freshness. They can be frozen for up to 3 months.
- To thaw, simply leave the fairy cakes at room temperature for a few hours. For a quicker option, you can microwave them on a low setting for 20-30 seconds.
- If you wish to enjoy your fairy cakes warm, preheat your oven to 150°c (300°f) and reheat them for about 5-10 minutes. This will revive their softness and flavor.
- Avoid storing fairy cakes in the refrigerator as it can cause them to dry out and lose their fluffy texture.
How to Reheat Leftovers
Preheat your oven to 150°c (300°f). Place the fairy cakes on a baking tray and cover them loosely with aluminum foil to prevent them from drying out. Warm them for about 10 minutes or until they are heated through.
If you prefer using a microwave, place the fairy cakes on a microwave-safe plate. Heat them on medium power for 10-15 seconds. Be cautious not to overheat, as this can make them rubbery.
For a quick stovetop method, use a steamer. Place the fairy cakes in a steamer basket over simmering water. Cover and steam for about 2-3 minutes until they are warm and soft.
To add a bit of crispiness, you can use a toaster oven. Set it to a low heat setting and place the fairy cakes inside for about 5 minutes. Keep an eye on them to ensure they don't over-brown.
If you have an air fryer, set it to 150°c (300°f) and place the fairy cakes in the basket. Heat them for about 3-4 minutes, checking halfway through to ensure they are warming evenly.
Essential Tools for Baking Fairy Cakes
Oven: Preheat to 180°c (350°f) to bake the fairy cakes.
Muffin tin: Holds the cupcake liners and batter while baking.
Cupcake liners: Line the muffin tin to prevent the cakes from sticking.
Mixing bowl: Used to combine and mix the ingredients.
Electric mixer: Creams the butter and sugar together until light and fluffy.
Spatula: Folds in the flour and helps scrape down the sides of the mixing bowl.
Measuring spoons: Measures the vanilla extract and milk accurately.
Measuring cups: Measures the flour and sugar.
Sifter: Sifts the self-raising flour to ensure a smooth batter.
Wire rack: Cools the fairy cakes completely after baking.
Toothpick: Checks if the cakes are baked through by inserting into the center.
How to Save Time on Making Fairy Cakes
Pre-measure ingredients: Measure and prepare all ingredients before starting. This ensures a smooth workflow.
Room temperature butter: Use softened butter to speed up the creaming process with sugar.
One-bowl method: Mix butter, sugar, eggs, vanilla extract, flour, and milk in one bowl to save on cleanup time.
Use an ice cream scoop: Use an ice cream scoop to evenly distribute the batter into the cupcake liners quickly.
Preheat the oven: Preheat your oven while preparing the batter to save time.
Fairy Cakes Recipe
Ingredients
Main Ingredients
- 125 g Butter softened
- 125 g Caster Sugar
- 2 Eggs large
- 125 g Self-Raising Flour sifted
- 1 teaspoon Vanilla Extract
- 2 tablespoon Milk
Instructions
- Preheat your oven to 180°C (350°F) and line a muffin tin with cupcake liners.
- Cream the butter and sugar together until light and fluffy.
- Beat in the eggs one at a time, then stir in the vanilla extract.
- Fold in the flour, then add the milk and mix until smooth.
- Spoon the mixture into the cupcake liners, filling each about two-thirds full.
- Bake in the preheated oven for 15-20 minutes, or until a toothpick inserted into the center comes out clean.
- Allow to cool in the tin for a few minutes, then transfer to a wire rack to cool completely.
Nutritional Value
Keywords
Suggested Appetizers and Main Courses
More Amazing Recipes to Try 🙂
- Coconut Custard Pie Recipe1 Hours
- Rumchata Pudding Shots Recipe10 Minutes
- Butter Pecan Ice Cream Recipe45 Minutes
- Hello Dolly Bars Recipe35 Minutes
- Roquefort Pear Salad Recipe15 Minutes
- Stewed Apples Recipe30 Minutes
- Chocolate Cherry Cake Recipe55 Minutes
- Canned Apple Pie Filling Recipe45 Minutes
Leave a Reply